skip to main |
skip to sidebar
Certain people prefer to see the Ids of any object in the trees.In XStudio 1.5, an option in the settings will allow to activate this feature.Hence the display can look like:
Starting with XStudio 1.5, email notification will be generated using the same mechanism than for reports. This means that the content of the email will be the results of an XML (generated by XStudio and including all the required data) transformed through an XSLT.Since you can edit and modify the XSLT, you can customize your email notification presentation (for instance the logo but also the data you want to include, their orders, the colors etc. etc.).In addition to this, the number of data included in the bug notification are bigger. With the default transform provided, the results is:
In XStudio 1.5, new settings will appear to better control email notification mechanisms:Send additional notification per failed test case:When you're running non-regression campaigns, this option can be useful as it will send you a specific notification as soon as one test case is failing (regression). The notification is sent immediately while the session is still running. One notification per failed test case is sent.Send bug notification only on status change:This option will limit the email notification to the case where the status of the bug has been changed. Also, for the integrated bug-tracking database, a new butto allows sending a reminder to all people involved in the bug:
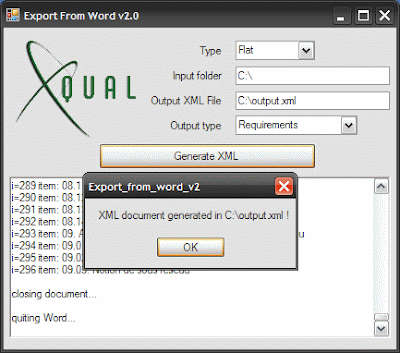
Before using a real Test Management system, people often use Microsoft Word to write their requirements or specifications.With XStudio 1.5, a tool allowing to read all your Word documents and generate an XML file will be delivered. Hence, you will be able to import very simply all your requirements/specifications in XStudio:- Install and run Export from Word v2.0

- Indicate a type of export (Flat or Deep)
- Indicate the root folder containing all the Word documents
- Press "Generate XML"
- Open XStudio and import the generated file
1) the "Deep" mode reads the Word document and will interpret any "leaf" tree node as a requirement. All its parent chapters will be imported as folders in the requirement tree2) the "Flat" mode reads on the summary of the Word document and import any entry (inluding the head numbering)


